8
Add Black Again


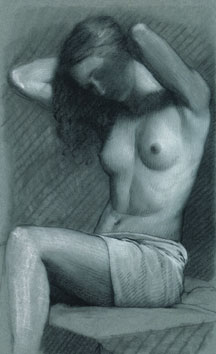
Step 8: Re-hatch the blacks, with the aim to close in on a "final" look.


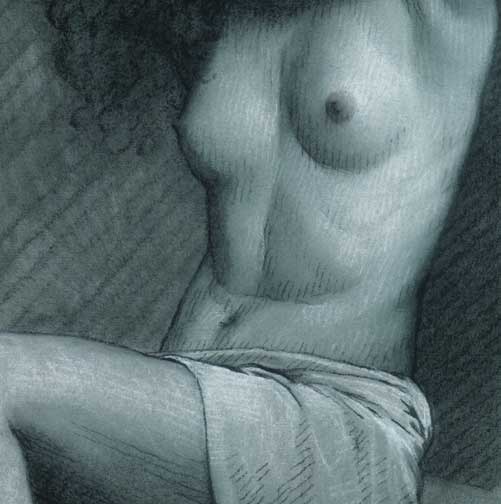
As with all stages, this one is done in row hatches. Blacks mark the forms in shade. In low light and halftone, both black and white can mingle (see ribs at flank). Alternately, the paper can be left "untouched" in these areas.

This hatching stage is different than the first two, because tones beneath are now closer to the final effect. The gap between hatches should be open enough to let the haze of color below play a role in the modeling. For additional darkening, you can repeatedly stump black hatches into the paper and reapply new hatches. Also, these hatches may be either
oblique, if you think that will be right, or they may be parallel to the edge or length which might possibly finish an area off. Finishing is theoretically possible if you did everything perfectly in preparation. Fortunately, erasable chalks and stumping permit endless layers and corrections, while never losing that fresh, not overworked, appearance.


The drape is darkened with diagonal black hatches. In the few examples that I have seen from Prud'hon, this was his choice for black hatch direction in drape.

Materials. Use chalks that freely release the colors, so you don't have to bear down. Your chalks should erase and smear, but leave a ghost with light stumping. In the handmade chalks, do not use the softest stick for this stage. Either the "medium" or "hard" will work, depending on your specific need. The hard will hold a point best. Use the harder black Conte.


Next Page: Demonstration: Step 9 -- Hatch, Tortillon, and Hatch Again
Updates | Discovering Prud'hon: Introduction to a Lesson on Technique | Why Is His Drawing Unique & Obscure? | Observations: Prud'hon's Materials | Discussion: Modern Materials | How to Make Your Own Better Black Chalks | Supply List: Black and White Chalk on Blue Paper | Observations: Parameters of Technique | Theory: Best Guess at Prud'hon's Step by Step Approach | Demonstration: Step 1 -- Outline | Demonstration: Step 2 -- Bold Hatching | Demonstration: Step 3 -- Stump Out Hatches | Demonstration: Step 4 -- Hatch White | Demonstration: Step 5 -- Hatch Black | Demonstration: Step 6 -- Lightly Stump | Demonstration: Step 7 -- Apply White Again | Demonstration: Step 8 -- Add Black Again | Demonstration: Step 9 -- Hatch, Tortillon, and Hatch Again | Demonstration: Step 10 -- Finishing Refinements | Demonstration: Steps 1 through 10 -- Visual Summary
 

What's New? | Shortcut  

Entrances: | Studio -| Alzofon Art Institute -| Idea Library | Academy | Guest Wing |


Rebecca Alzofon can be e-mailed at
rebecca@art.net
This page updated July 16, 2003
1999 by Rebecca Alzofon. All rights reserved.