
3
Stump Out Hatches
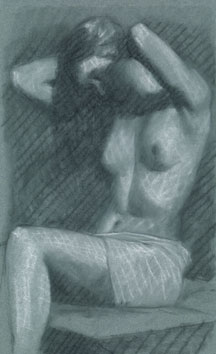
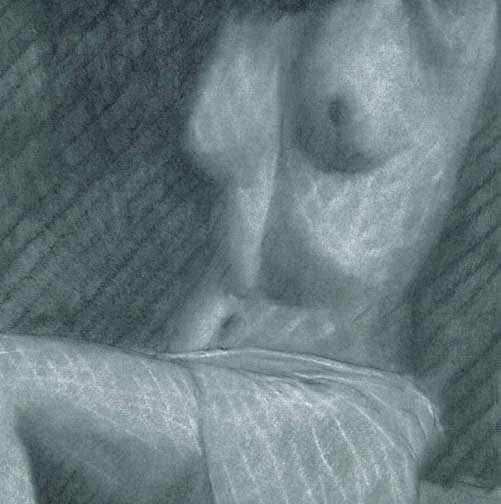
Step 3 achieves a coarse tonal arrangement. Using the large stump, rub in the separate colors in accordance with their shade or lit condition.
Use one end of the stump for black, and the other for white.
Note, however, the eyewitness account describes a stage where Prud'hon smears black and white together, "until a smooth and muted velvet gray tonality remains." Total separation of black from white, then, is not required. In fact, the gray tone seems fairly common in Prud'hon's drawings. But never forget: form depends on lights and darks. There is a basic rule that no part of the shadow may ever be as light as the lit side, and no part of the lit side may ever be as dark as the shadow.
The stump will ingrain a hatch if you rub it with the direction of the hatch. If you rub it across the hatch, the stump will blend the chalk out into the raw paper. At this stage, it is best to rub tones into the raw paper, so make your stump go perpendicular to the direction of the hatch.
If you wish, you can leave the middle value areas as raw paper.
If you realize you shouldn't have covered an area with the chalk, you can erase all the way back to the paper. Or, if the first stumping appears too opaque over the paper, you can evenly remove some, but not all, of chalk with a clean chamois.
The stump may be used as a line making tool by smearing with the point.
In this drawing, the stumping of the lower leg becomes the final treatment.